Kenmore self-cleaning ovens offer an innovative solution for effortless maintenance. Using high temperatures, they transform food residue into ash, simplifying cleanup and enhancing convenience for homeowners.
1.1 Key Features of Kenmore Self-Cleaning Ovens
Kenmore self-cleaning ovens boast advanced features like high-temperature cleaning cycles, automatic door locking, and eco-friendly designs. They offer adjustable cleaning durations (2-4 hours) based on soil levels, ensuring efficient results. The ovens feature large capacities, multiple racks, and extra-large viewing windows for convenience. Some models include energy-saving settings, timer functions, and a lockout feature for safety. The self-cleaning process eliminates food residue, leaving only ash to wipe away. These ovens are designed for durability and ease of maintenance, making them a practical choice for modern households.
1.2 Benefits of Using the Self-Cleaning Feature
The self-cleaning feature of Kenmore ovens offers numerous benefits, including effortless food residue removal and reduced manual scrubbing. It uses high temperatures to turn tough stains into ash, which is easy to wipe away. This feature saves time, eliminates the need for harsh chemicals, and ensures a deeper clean than traditional methods. It also maintains the oven’s performance and appearance, preventing grease buildup that could affect cooking efficiency. Additionally, it’s eco-friendly and safe, as it avoids the use of commercial cleaners, making it a convenient and efficient cleaning solution for homeowners.
Understanding the Self-Cleaning Process
The self-cleaning process uses high temperatures to burn food residue, leaving ash. The oven locks during cleaning, ensuring safety and efficiency, with cycles lasting 2-4 hours.
2.1 How the Self-Cleaning Cycle Works
The Kenmore self-cleaning cycle works by locking the oven door and heating to extreme temperatures, typically between 850°F and 950°F. This process incinerates food residue, turning it into ash. The cycle duration can be selected based on the level of cleaning needed, usually ranging from 2 to 4 hours. Once the cycle completes and the oven cools, the door unlocks, allowing you to wiping out the ash easily. This method ensures a thorough clean without harsh chemicals, making maintenance straightforward and efficient for users.
2.2 High-Temperature Cleaning: What to Expect
During the self-cleaning cycle, the oven heats to extremely high temperatures (850°F–950°F) to incinerate food residue. This intense heat turns tough stains and splatters into ash. The process typically takes 2–4 hours, depending on soil level. Expect a strong odor as food particles burn off. The oven door remains locked throughout to ensure safety. After completion, let the oven cool completely before wiping out the ash. Note that the cycle is noisy and produces heat, so keep the kitchen well-ventilated. Avoid opening the oven during cleaning, as it remains dangerously hot. Once cooled, the door unlocks, allowing easy ash removal.
2.3 Safety Precautions During the Cleaning Cycle
The self-cleaning cycle generates extreme heat, reaching temperatures of 850°F–950°F, so keep children and pets away. Never open the oven door during cleaning, as it locks automatically to prevent burns. Avoid touching the oven surfaces, as they remain dangerously hot even after the cycle ends. Ensure proper ventilation, as strong odors and fumes are released. Do not disable the locking mechanism, as it ensures safety. After cleaning, let the oven cool completely before wiping out ash. Always follow the manual’s guidelines to avoid accidents and maintain appliance longevity.
Preparing Your Oven for Self-Cleaning
Preparing your Kenmore oven for self-cleaning involves removing racks and utensils, cleaning the door and window, and protecting surrounding surfaces from heat and residue. Ensure all areas are clear to allow proper cleaning and ventilation. This step ensures a safe and effective self-cleaning cycle.
3;1 Removing Racks and Utensils
Before initiating the self-cleaning cycle, remove all racks, broiler pans, and utensils from the oven; These items can obstruct the cleaning process and may damage the oven’s interior. Place them in a safe location to avoid exposure to high temperatures. For racks, wash them separately with soap and water or soak them in hot soapy water before scrubbing. Ensure the oven is completely empty to allow proper airflow and even heating. This step ensures a safe and effective cleaning cycle. Additionally, covering surrounding surfaces with a protective layer can prevent any accidental debris from spreading. Always refer to your Kenmore manual for specific guidelines.
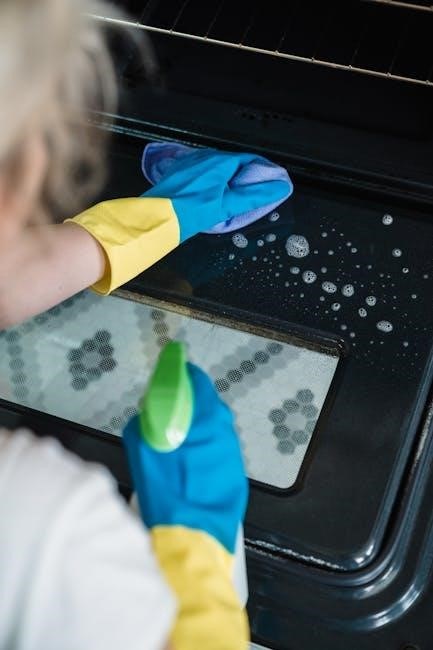
3.2 Cleaning the Oven Door and Window
Cleaning the oven door and window is essential for maintaining visibility and hygiene. Before the self-cleaning cycle, wipe the door and window with a damp cloth to remove loose debris. For tough stains, mix water and mild detergent, apply it to the surfaces, and let it sit for 20 minutes. Avoid using abrasive cleaners or commercial oven cleaners, as they may damage the glass or finish. After the self-cleaning cycle, use a damp cloth to wipe away residue. For the window, avoid using the self-cleaning feature if it’s not heavily soiled, as high heat can cause streaks. Regular cleaning ensures clarity and safety.
3.3 Protecting Surrounding Surfaces
Protecting surrounding surfaces is crucial during the self-cleaning cycle due to high temperatures. Cover countertops, floors, and nearby surfaces with heat-resistant materials like foil or silicone mats. Ensure the area is well-ventilated to prevent fumes from damaging surfaces or causing discomfort. Avoid placing flammable materials near the oven. After the cycle, allow the oven to cool before cleaning residue. Regularly inspect and clean vents to maintain proper airflow. This ensures safety and prevents damage to your kitchen surfaces while keeping your Kenmore oven in optimal condition for years to come.

Operating the Self-Cleaning Feature
Operating Kenmore’s self-cleaning feature is straightforward. Press the CLEAN button, select the cycle duration, and let the oven handle the rest. The oven locks automatically, ensuring safety during the high-temperature cleaning process.
4.1 Step-by-Step Instructions for Starting the Cycle
- Press the CLEAN button on the control panel to initiate the cycle.
- Select the desired cleaning duration: 2, 3, or 4 hours, based on soil level.
- Confirm your selection, and the oven door will automatically lock.
- The cycle begins after a 30-second delay, heating the oven to high temperatures.
- Allow the cycle to complete, then let the oven cool before opening the door.
Follow these steps to ensure safe and effective cleaning of your Kenmore oven.
4;2 Selecting the Cleaning Duration
Selecting the right cleaning duration ensures optimal results for your Kenmore oven. The default cycle is typically 3 hours, but you can adjust based on soil level:
- 2 hours for light soil and minor food residue.
- 3 hours for moderate buildup and standard cleaning needs.
- 4 hours for heavy-duty cleaning and tough, baked-on stains.
Use the control panel to adjust the duration, ensuring the oven door is locked before starting. The longer cycles are best for deeper cleans, while shorter cycles suffice for maintenance cleaning. Always refer to your manual for model-specific guidelines.
4.3 Understanding the Locking Mechanism
The locking mechanism on Kenmore self-cleaning ovens is a safety feature that ensures the door remains closed during the high-temperature cleaning cycle. Once the cycle starts, the door automatically locks, and it remains locked until the oven cools down. This prevents accidental burns and ensures effective cleaning. The lock is triggered when you press the Clean button and set the duration. A red light or indicator will signal that the door is locked. Never attempt to force the door open during the cycle, as this could damage the lock or the oven. Always wait for the cycle to complete and the oven to cool before opening.

Post-Cleaning Maintenance
After the self-cleaning cycle, let the oven cool. Wipe out ash with a damp cloth and clean racks separately. Regular maintenance ensures optimal performance and appearance.
5.1 Wiping Out Ash and Residue
After the self-cleaning cycle, allow the oven to cool completely. Use a damp cloth to wipe out ash and residue, as moisture helps loosen particles. Avoid using abrasive cleaners or harsh chemicals, as they can damage the interior finish. For stubborn spots, lightly scrub with a soft sponge. Never touch the heating elements or window during cleaning. Properly dispose of the ash and rinse the cloth thoroughly. This step ensures a clean and safe oven for future use, maintaining its efficiency and appearance.
5.2 Cleaning the Oven Rack and Accessories
Remove racks and accessories before starting the self-cleaning cycle. For heavy soiling, place racks in a dishwasher or manually clean with a mixture of baking soda and water. Apply the paste, let it sit overnight, then scrub and rinse. Avoid using abrasive cleaners to prevent damage. For lighter cleaning, soak racks in hot soapy water. Dry thoroughly with a soft cloth to prevent water spots. Regular cleaning ensures racks remain in good condition and maintains the oven’s performance. Always refer to the manual for specific cleaning recommendations tailored to your Kenmore oven model.
5.3 Regular Maintenance Tips
Regular maintenance ensures your Kenmore self-cleaning oven performs optimally. Avoid using commercial oven cleaners, as they can damage the interior finish. Instead, wipe up spills immediately with a damp cloth to prevent hardening. For tougher spots, mix water and baking soda to create a paste, apply it, and let it sit before scrubbing. After the self-cleaning cycle, remove ash with a damp cloth. Check the door gasket for wear and replace it if necessary to maintain a proper seal. Regularly cleaning racks and accessories also helps maintain hygiene and efficiency. Refer to your manual for model-specific care instructions.

Troubleshooting Common Issues
Address common issues like a malfunctioning self-cleaning cycle or door lock by checking the manual; Ensure the oven is empty and the door gasket is undamaged for proper function.
6.1 Oven Door Not Locking Properly
If the oven door fails to lock properly, the self-cleaning cycle won’t start. Ensure no food residue or debris obstructs the locking mechanism. Check if the door is aligned correctly and clean the gasket. If issues persist, refer to the manual for troubleshooting steps or consider professional assistance to resolve the problem quickly.
6.2 Self-Cleaning Cycle Not Starting
If the self-cleaning cycle fails to start, ensure the oven door is fully closed and locked. Verify that the clock is set correctly and press the CLEAN button firmly. Check for error codes and consult the manual for specific solutions. If issues persist, unplug the oven for 30 seconds to reset the controls. Ensure no obstructions or food residue interfere with the door’s locking mechanism. Proper alignment and a clean gasket are essential for the cycle to initiate smoothly. Refer to the troubleshooting section in the manual for detailed guidance.
6.3 Error Codes and Solutions
Kenmore ovens may display error codes like “F30” or “F31” during self-cleaning issues. These codes often indicate problems with the door lock or temperature sensor. To resolve, ensure the door is fully closed and latched. If the issue persists, unplug the oven for 30 seconds to reset. For temperature sensor errors, check for proper installation or replace if damaged. Refer to the manual for specific code meanings. If the door gasket is damaged, replace it to maintain a proper seal. Always follow safety guidelines and consult the manual or a technician for persistent issues to avoid further complications.
Safety Guidelines for Users
Always ensure proper ventilation during self-cleaning cycles to prevent fume accumulation. Never use commercial oven cleaners, as they can damage the oven’s finish or harm the self-cleaning feature.
7.1 Ventilation Requirements
Proper ventilation is essential during the self-cleaning cycle to remove fumes and odors. Open windows and ensure good airflow in the kitchen. Turn on your range hood or exhaust fan to help ventilate the area. If your microwave is above the oven, activate its exhaust fan to assist with air circulation. Keep the kitchen well-ventilated throughout the cycle to prevent the accumulation of harmful fumes. Avoid using commercial oven cleaners, as they can release toxic chemicals when heated. Adequate ventilation ensures a safer and more effective cleaning process, protecting both you and your home from potential hazards.
7.2 Avoiding Commercial Oven Cleaners
Avoid using commercial oven cleaners, as they can release harmful fumes when exposed to the high temperatures during the self-cleaning cycle. These chemicals can damage the oven’s finish or harm the door gasket, essential for maintaining a proper seal. Kenmore self-cleaning ovens are designed to eliminate food residue through heat alone, making harsh cleaners unnecessary. Instead, rely on the oven’s built-in cycle to safely and effectively clean without potential damage. Using commercial products can void your warranty and create maintenance issues. Stick to the self-cleaning feature for a safe, efficient, and recommended cleaning process.

Additional Features of Kenmore Ovens
Kenmore ovens include a timer for precise cooking control, energy-saving settings to reduce power usage, and an oven lockout feature to prevent accidental start, enhancing safety and convenience.
8.1 Timer and Energy-Saving Settings
Kenmore ovens feature a convenient timer that allows precise control over cooking durations, ensuring dishes are cooked to perfection. The energy-saving settings help reduce power consumption, making the appliance eco-friendly. Users can easily set the timer for specific intervals, such as 5 minutes, and rely on the oven to automatically turn off once the time is up. This not only enhances cooking efficiency but also minimizes energy waste. The combination of a timer and energy-saving options provides a practical and sustainable cooking experience, aligning with modern needs for convenience and environmental responsibility. These features make Kenmore ovens a smart choice for everyday use.
8.2 Oven Lockout Feature
The Oven Lockout Feature on Kenmore ovens ensures safety by preventing accidental activation, especially in households with children. This feature locks the oven controls, disabling all functions until unlocked. It provides peace of mind by avoiding unintended operation. The lockout can be activated manually, offering control over the oven’s accessibility. This feature is particularly useful for families, as it enhances safety without compromising functionality. By safeguarding against accidental start-ups, the Oven Lockout Feature adds an extra layer of security, making Kenmore ovens a reliable choice for safe and efficient cooking environments.

Accessories and Parts
Kenmore ovens come with essential accessories like racks and utensils. Replacement parts such as door gaskets ensure optimal performance. Accessories enhance functionality and maintain efficiency during use.
9.1 Recommended Cleaning Tools
For maintaining your Kenmore oven, use soft brushes or microfiber cloths to wipe surfaces gently. A scraper tool can help remove stubborn residue without damaging the interior. Hydrogen peroxide is recommended for cleaning the door gasket, as harsh chemicals may harm the seal. Additionally, a baking dish filled with water can be used during the steam cleaning process. Avoid using commercial oven cleaners, as they may damage the oven’s finish. Always refer to the manual for specific cleaning tool recommendations to ensure safe and effective maintenance of your appliance.
9.2 Replacing the Door Gasket
Replacing the door gasket on your Kenmore oven is essential for maintaining proper sealing and heat retention. Over time, the gasket may wear out or become damaged, reducing efficiency. To replace it, purchase a compatible gasket from Kenmore or an authorized dealer. Turn off the oven and allow it to cool completely before starting. Remove the old gasket by gently pulling it away from the door frame. Install the new gasket, ensuring it fits snugly and aligns properly. Refer to your Kenmore oven manual for specific instructions to ensure a secure and correct installation.

Model-Specific Instructions
Kenmore self-cleaning oven models like 790.7753 and Kenmore Elite 40549 have unique features and instructions. Always refer to your specific model’s manual for accurate guidance and operation.
10.1 Kenmore Model 790.7753, 790.7754, 790.7751, 790.7752
For Kenmore models 790.7753, 790.7754, 790.7751, and 790.7752, the self-cleaning feature operates at high temperatures to incinerate food residue. These models require specific pre-cleaning steps, such as removing racks and ensuring the door is closed. The self-cleaning cycle typically lasts 2 to 4 hours, depending on soil levels. Post-cleaning, allow the oven to cool before wiping away ash. Refer to the manual for precise instructions tailored to these models to ensure optimal performance and safety.
10.2 Kenmore Elite Model 40549
The Kenmore Elite Model 40549 is a 24-inch electric self-cleaning wall oven with a 3.3 cubic foot capacity and an extra-large viewing window. It features two racks for versatile cooking. To activate the self-cleaning cycle, ensure the oven is empty, the door is closed, and the clock is set. Press the CLEAN button, select the desired duration (2, 3, or 4 hours), and let the high-temperature cycle burn food residue into ash. After cooling, wipe out ash with a damp cloth. Follow manual guidelines for optimal performance and safety, ensuring proper maintenance of this advanced cooking appliance.
Where to Find the Kenmore Oven Manual
Access the Kenmore oven manual online by visiting the official website. Enter your model number in the search bar to download the manual, ensuring proper usage and troubleshooting guidance.
11.1 Downloading the Manual Online
Downloading the Kenmore oven manual is straightforward. Visit the official Kenmore website and navigate to the support section. Enter your oven’s model number in the search bar to find the specific manual. Once located, click the download button to save the PDF version to your device. This ensures you have easy access to troubleshooting tips, operating instructions, and maintenance guidelines tailored to your model. Regularly reviewing the manual helps optimize oven performance and address any issues promptly.
11.2 Key Sections to Refer to in the Manual
The Kenmore self-cleaning oven manual contains essential sections for optimal use. The Care and Cleaning section details how to prepare for and maintain the self-cleaning feature. The Operating Instructions provide step-by-step guidance for activating the self-clean cycle and setting the timer. Additionally, the Troubleshooting section addresses common issues like error codes or a malfunctioning self-cleaning function. The manual also covers Safety Guidelines, emphasizing proper ventilation and avoiding commercial cleaners. Reviewing these sections ensures safe and efficient use of your Kenmore oven, helping you resolve issues quickly and maintain peak performance.